My car was such a beautiful mosaic of random colors, I really hated to do it. The paint had bubbles, chips, and drips exactly where I had wanted them. The two or three tones of off-white were just the right shades with a smattering of red and gray.
I couldn't just leave well enough alone. I had to go and ruin all of that... perfection... because Ol' Rusty had an appointment. An appointment with destiny.
The day had come to haul her carcass off to the media blaster. Again, something I
should have had done right at the start but better late than never, right?
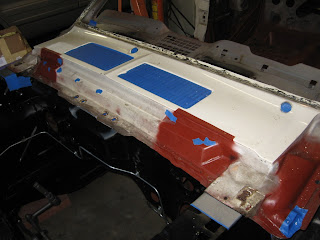
I had read somewhere that it's a good idea to mark out dings, etc on an old paint job to help you reference the location of those dings after the car has been blasted. So I eyeballed the panels the best I could to find even the slightest little dings and circled them with a grease pencil. I'll use these photos to determine where to pay special attention during body work.

Note that big circle towards the rear center of the panel. That wasn't actually dented but rather is the location of this car's dirty little secret. The PO had replaced the rear quarter panels on the car with early 68 (before 2/15/1968) quarters instead of late (after 2/15/1968). The early 68 quarters have an indented side marker whereas the late 68 models, like this one (built 2/28/1968), have a flush-mounted side marker so the PO had the indention filled. You can see the indention on the other side of the trunk if you look closely at the picture below. The big black circle on this side of the car is to mark the location of the indention so I can instruct the media blaster not to worry about wasting time digging out the filler because I'm going to do the same thing and fill and level the indention or, if I'm feeling all high-and-mighty that day, will attempt to cut and patch it with sheet metal.
I had read accounts on the
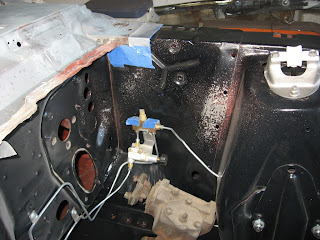
VMF about the hell of removing media from the cowl so my bright idea to solve this problem was to cover any opening in the cowl with... *smacks self on forehead*, masking tape of all things and ask the media blaster to "work around the tape".
Looks like it'll work doesn't it? Read on!
I also didn't relish the thought of blowing media out of every enclosed space so I masked off the holes over the frame rails, seat platform, and rockers even though I wasn't going to have these areas blasted. I just figured the media would go everywhere.
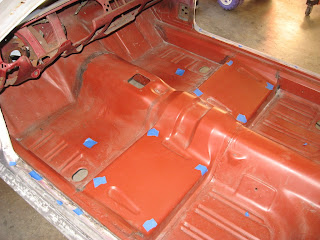
I did the same for the drain holes on the rockers.

The question of transport crossed my mind on many occasions and during several early morning insomnia sessions. The media blaster is 20 miles from my house and I could rent a tow dolly or car hauler from UHaul, call a friend, or hire a flat bed. Well, I really hate tow dolly's and I don't have a big enough vehicle to rent an car hauler, and I don't have any friends... with car haulers, so that left me with door #3, hire a flat bed. At the recommendation of the media blaster, I called Jose at DJ Towing for $55 hook-up with first 10 miles free, $2.50/mile after. He definitely had the best price that I'd found so I gave him a call.
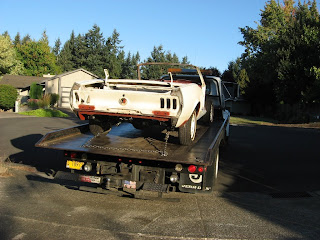
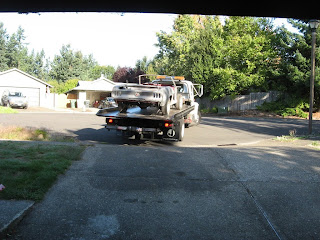
He showed up right on time at 8:00 AM sharp Friday morning, and pulled the car up out of my pain-in-the-arse driveway and onto his flatbed. He used nylon straps around the LCAs on both sides.

I couldn't follow him directly to the blasters at that time so I paid him his $80 and Ol' Rusty went for a ride.
My empty garage bay. Haven't seen this in a couple years. Um... ignore the mess k? Thanks.

I found the media blaster shop. I could tell I was there by two clues. 1) There was a big sign that said "Media Blasters" which actually happened to be the company's name, and 2) There was a forlorn 68 Mustang Convertible in the front that looked vaguely familiar to me. Oh yeah, I strapped the trunk lid in the car to have it done too. I thought it would make a good test for hoods, fenders, doors etc so I don't put all my eggs in one basket. I chose this particular blaster because he had references, used walnut shells, and only charged $75 per hour.

The car was actually finished on Saturday (the next day!) but Ma Nature decided to water the flowers that day so Tony the media blaster and Jose the tow truck driver both agreed to meet me Sunday morning at 8:30 AM. Well, I got there at 8:25 AM and the car was already loaded on the flatbed which I wasn't expecting because I kind of wanted to inspect the work first but being on the truck made it moot since I wasn't about to tell these guys, who agreed to do the job on short notice
and meet me on a Sunday morning, to unload the car to fix something. Tony the media blaster told me a few facts about how the job went. A) The metal is good, no surprises or new rust to repair anywhere. B) It appears that the quarters had been blasted before because the finish was really rough. The panels aren't warped or anything so they did a good job but it definitely wasn't walnut shells. C) The job took 7 hours. D) The trunk lid was coated THICK with filler or high build primer or
something and took forever.
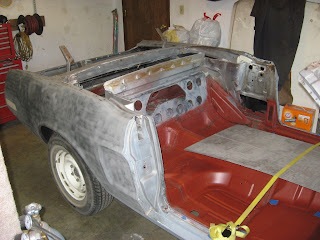
Nothing distressed me so I gave him his cashier's check for $562 and told Jose I'd meet him back at the house. A short time later, the naked pony saunters back into her stable.
It doesn't look too bad. I was expecting whiter, cleaner-looking metal I guess but this is how it turned out. I told Tony not to worry about the interior of the car at all other than in the inside of the quarter panel wells.
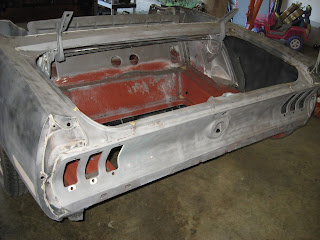
The tops of the wheel wells and insides of the rear quarters came out very nice. If you look at this
picture you can see what it looked like before.

A shot toward the drain channel which looks to be in really great shape. I instructed the blaster not to do the passenger compartment side of the rear seat back.

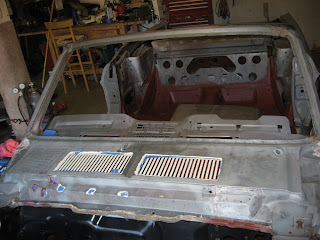
Here's a shot from the rear. The red primer took a bit of a beating but that can be fixed. Also, they didn't remove the sealer from the seams. That was actually by my instruction as I could do it with my grinder wire wheel.
Issue #1 concerns me a bit. I'm pretty sure it's bad to see the location of the structural members on the underside from the top of the trunk lid. I don't blame this media blaster though. If he was telling the truth about the build-up on the lid then the prior media blaster who used sand on the car in the 80's is the culprit here. He likely warped the top and had to build it back up to level it. I have 3 choices here. 1) Build it up again. 2) Buy a new metal trunk lid. Or 3) Buy a Shelby style fiberglass trunk lid, quarter extensions, and tail light panel, and start the Shelby conversion I have planned in the back of my mind for 5 years down the road.

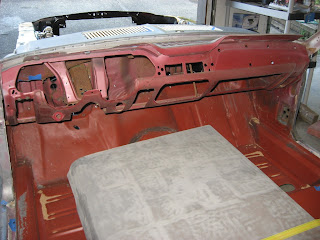
Issue #2 is that even though I instructed the media blaster to do the dash, he didn't. I don't know why, maybe he was trying to get the car done in the quoted time and wasted too much time on the trunk lid. This is one area I was really looking forward to having done so I was a bit disappointed.
Issue #3 is that my beautiful masking job wasn't particularly effective. The blaster shot right though masking tape like it wasn't even there. This is probably a big DUH to everybody else in the world but it escaped me. Duct tape is the only tape that even has the slightest chance against media. 2 layers even. Sooo... I'll be cleaning out my cowl... *sigh*. I'm okay that the cowl vent fins didn't get blasted. I can do that with my wire wheel and didn't risk the blaster messing up the sealer and paint in the cowl.
Issue #4. Oh, curse you issue #4.
So, there it is. I think we've all learned several valuable lessons today. I'm generally happy with the results but I wouldn't have wanted to be the media blaster on duty that day. A guy comes in with a hundred instructions, doesn't mask adequately, and has new paint to work around. I hope I didn't stress the poor guy out too much. The moral of this story:
Blast first, ask questions later.


