Adsense review

Sunday, March 24, 2013

On Top of Ol' Rusty (Part 4)

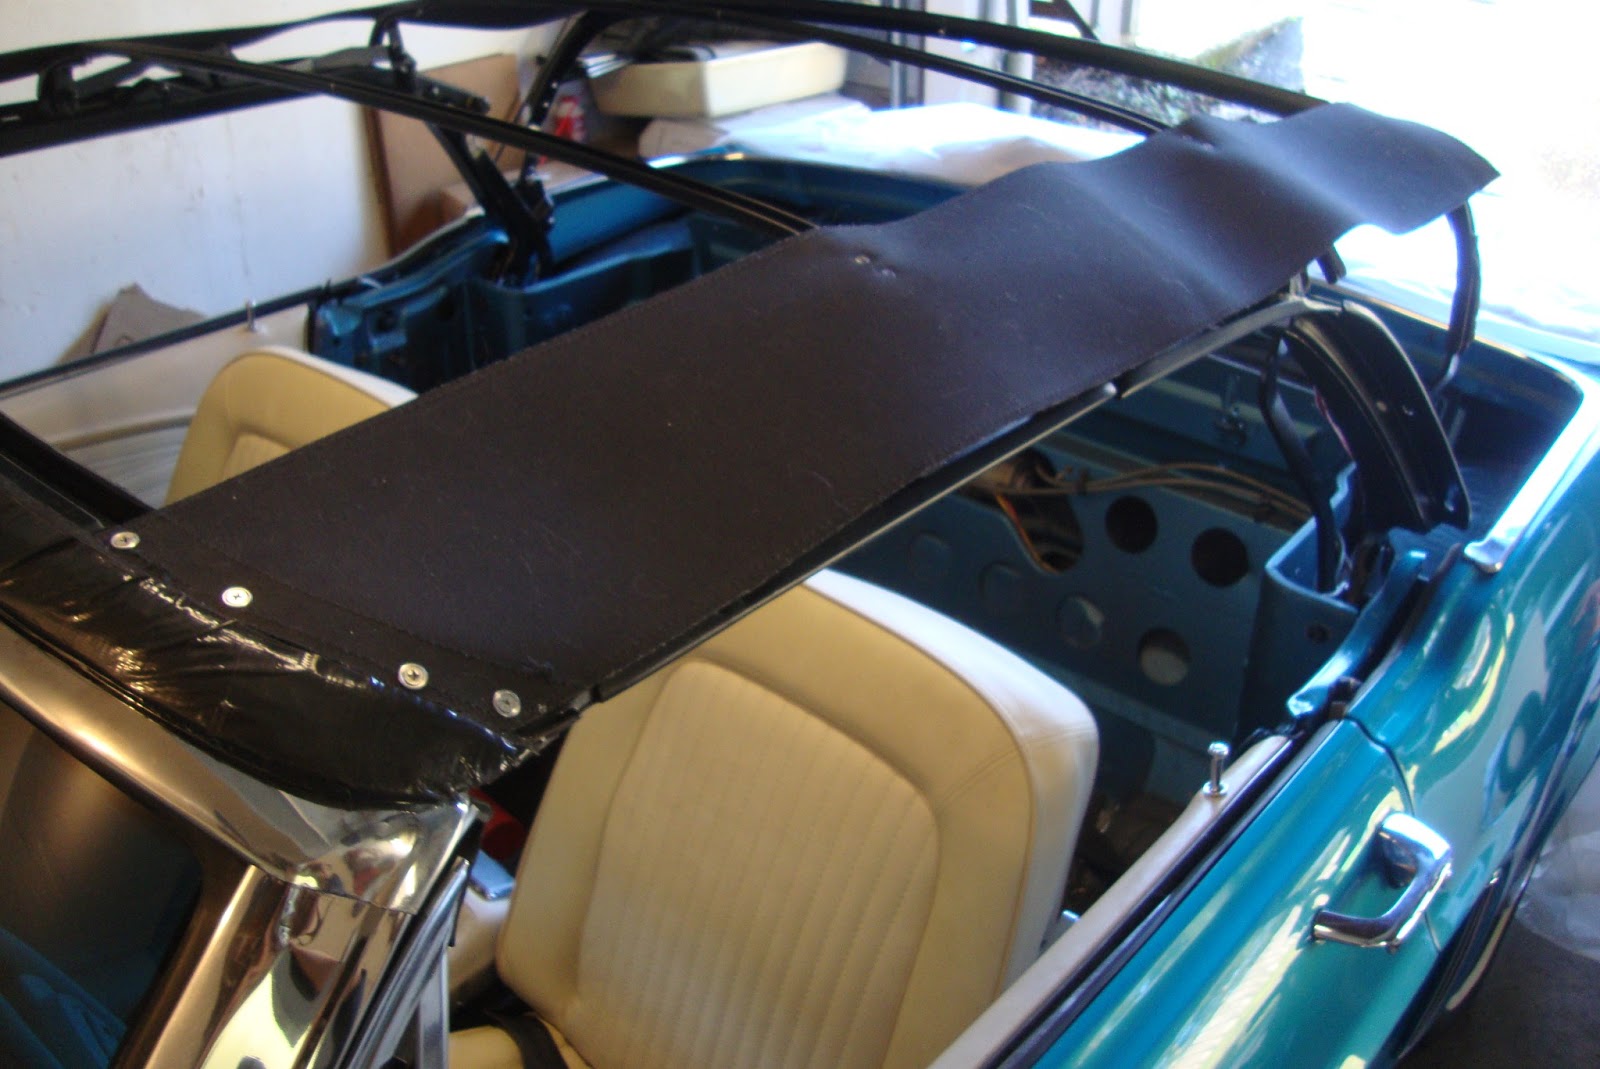
With the pads fitted the best I could muster, I stapled the rear quarter pads across bow 4 and trimmed the excess.  The rear quarter pads were made of a fairly stiff material and tended to bunch rather than conform to the complex curves.  The bottom section of the rear quarter pads actually do straighten out rearward toward the drainage channel where they mount and then bend down to the back of the tack strips.  All of that change in direction resulted in a difficult fit (for me anyway).  I don't think I'd recommend this type of pad.  If you can get more original weaved pads, I think you'll have an easier time in fitting them since these are just too stiff.

After fitting the pads, I taped over the pad screws on the bows as well as the bow 4 side and rear pad seams.

Rear quarter pad stapled up.

The other side.  Trimmed.

Taped over the screws.

Taped over the rear transition seam.

I layed out the top and stuck strips of masking tape next to each bow sleeve and the front and back edges and marked center on them.  If you do something similar, keep in mind that the listing sleeves are not necessarily centered on the top.  One of mine was off center by a half inch, so use the top seams to find the center of the fabric.  I then marked center on the windshield, the rear curtain zipper, and each of the bows.  I kind of went off the prescribed methodology here because I based my top installation on the centers of bow 2 and 3.  I threw the top over the frame and inserted the listing bars into the sleeves and tightened the outside screws which don't go through the sleeve fabric.  This allowed me to center the sleeves on the bows and ensure that the bars were at the bottom of the sleeves.  I then drove in the remaining screws into bows 2 and 3 and that's how it stayed for the remainder of the install.

Marked center all along the underside of the top.

Marked center along all of the bows, the windshield, and rear window.

Inserted listing bars, set center, and screwed them down.

Windshield/Top center check.


Rear window center check.
I then clamped the front side of the top to the front frame segment where there's a flap that overlaps.  I also clamped the rear quarter window flaps to the frame where the side welting of the top aligned with the frame and the clamps also remained for the duration of the install.

Clamps on front sides and rear quarter window frame.

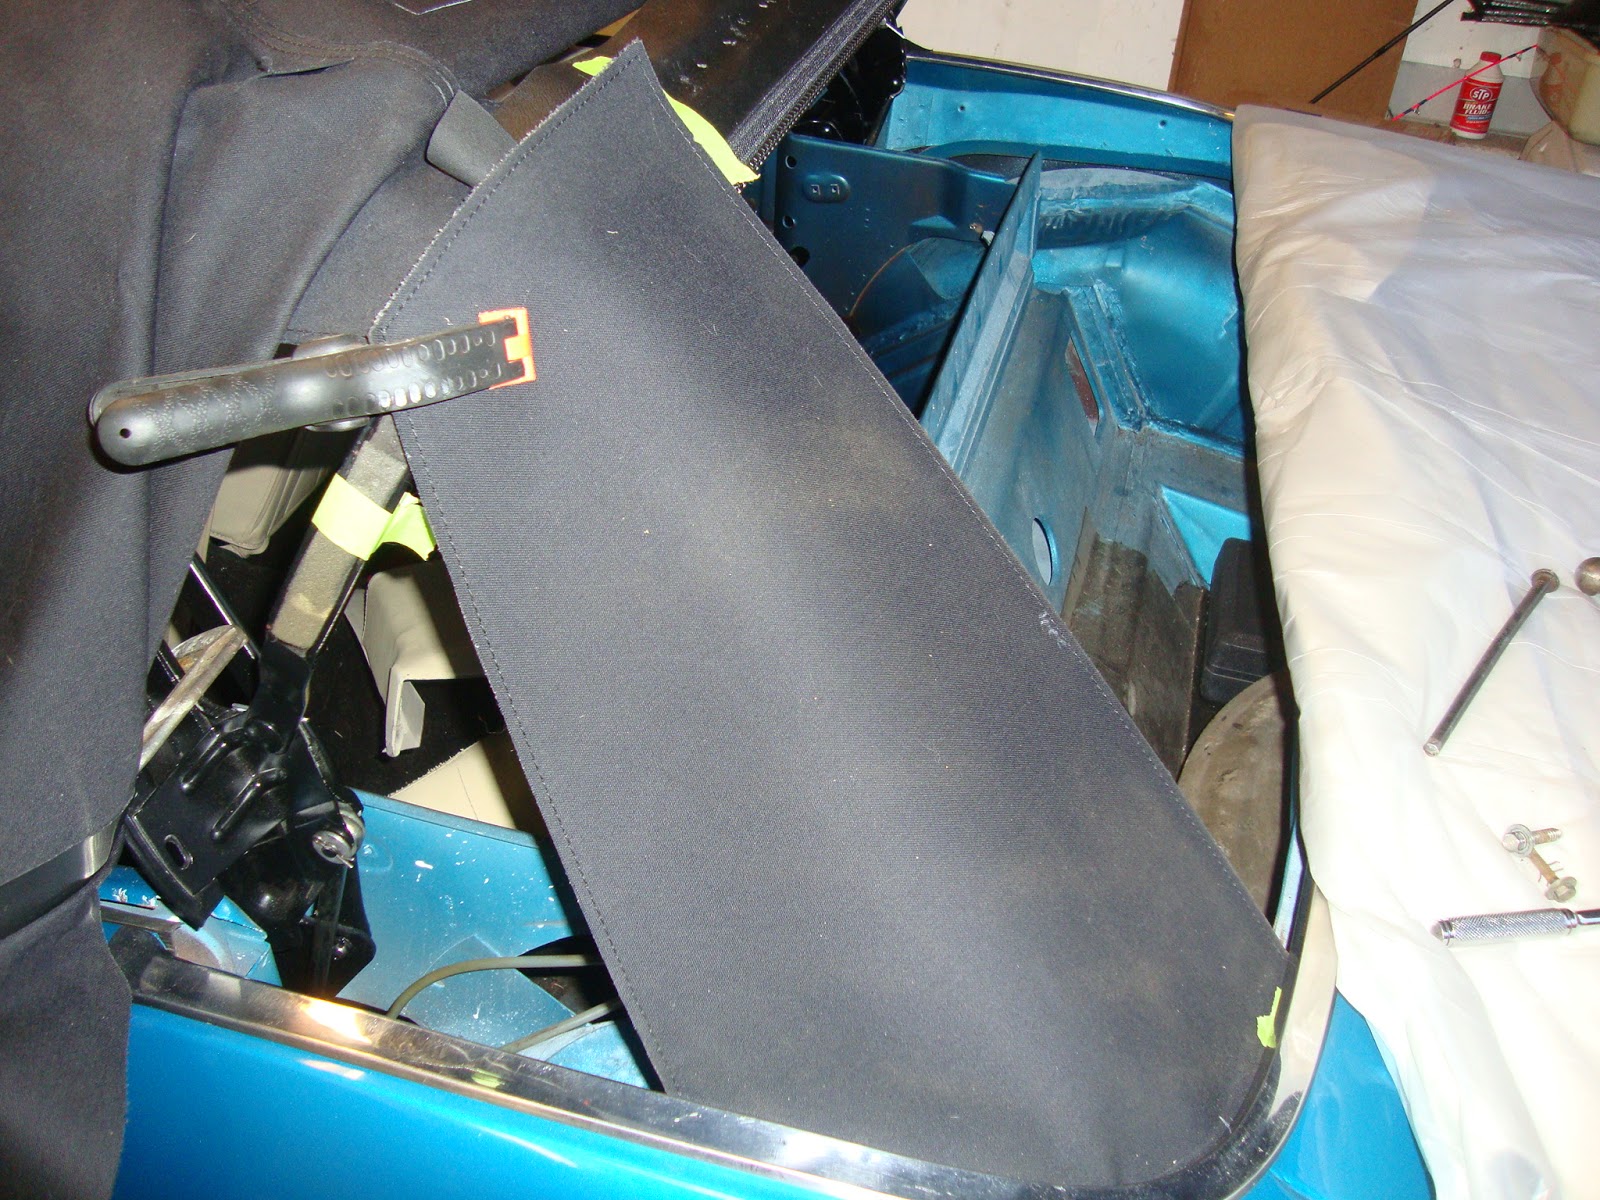
I then took the stress off of the rear quarter panels of the top by supporting the top up about 5 inches using a coffee can and crawled into the car and laid the top side rear quarter fabric against the inside of the car.  I found that this side section lays out the easiest since its straight until it gets to the rear curve of the well so I was able to pull it down tight while laying out straight with no wrinkles and then marked the location of the front-most tack strip mounting hole in the back of the drain channel.  I then used that as a reference point for laying the top fabric over the tack strip such that the mounting hole was aligned with it's slot in the tack strip and I drove a screw into the edge of the fabric and into the tack strip.

I then drove that one tack strip bolt in through the tack strip and fabric and used it as a basis for pulling the fabric taut and even over the rest of the tack strip.  I marked the fabric at the tack strip edge and put some preliminary staples in.  I removed the coffee can put let the top lay under its own weight while I adjusted the staple locations a few times until it looked like it was going to lay straight at which time I smacked a few dozen staples in and bolted the tack strip to the car.  I repeated this process for both sides.


Holding the top up for initial rear quarter fitting.

Mounting hole in fabric used to find approximate starting point

marked the tack strip and pad locations on the top fabric for relocation.

Test staples

Getting there.

rear window installed after top rear quarters fitted.

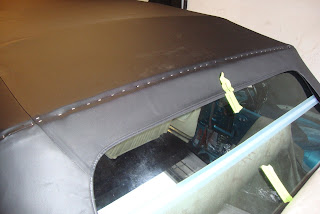
After I got both rear quarter top panels in place, I contact cemented the rear quarter window flaps to the frame on both sides ensuring that they laid with as few wrinkles in the rear top panels as possible.  I opened the top about 2" and clamped the fabric to the front of the header bow ensuring that the sides of the top aligned with the frame edges on both sides equally and that the top was centered to the front windshield mark and drew a while line along the very front edge of the header bow on the fabric to mark it's position.

I opened the top all the way back and contact cemented the front edge of the top fabric to the underside of the header bow and trimmed the excess.  I then drove staples into the tack strip followed by a new welting and more staples to hold it in place. 

Contact cemented rear quarter window flaps.

Clamped and marked front edge.

Contact cemented top edge.

Top almost installed.

New front welting.

Now, keeping with my bass-ackwards methodology, I marked the center line of bow 4 and drove staples in a line and stuck a 3/8" wide strip of black tape over them.   The rear wire-on was then stapled over those staples and folded over and finished off with new end caps.

Rear bow staples

Rear bow staples covered by tape.

Rear bow wire-on.

Wire-on finished.

The next step was the installation of the weatherstrip on the front bow and front frame segments (it's one long piece of rubber weatherstrip).  This turned out to be a huge pain in the arse!  I installed it and removed it several times before I was able to get it to lay fairly flat along the header bow AND fully contact the frame segment.  I found the secret to be the driving of a screw into the metallic "flap" that sits behind the latch and pin on the header.  Once that's screwed in, the center section is laid out and the seal mounting strip is inserted, centered, and secured with it's 12 stainless screws.  

Front seal to side seal transition screw.

Seal mounting screw hole.

Front seal installed.

The driver window needed major adjustment to contact the weatherstrip and even then, there's an annoying gap between the front-most edge of the weatherstrip, the header trim, and the side glass.  This is similar on both sides so I'm wondering if I maladjusted the header bow waaaay back at the start.  I'll have to work this out and correct it.  Also, the top had a few wrinkles before installing the weatherstrip but not terribly noticeable but after installing weatherstrip, the front of the bow sits up higher so now more wrinkles are noticeable.

All seals installed and side window fitment.

Finally, the new well liner could be installed.  I bought a kit of screws with the well liner so I basically just drove them in along the doubled-up edge of the liner starting at the center point (marked by a cut-out V in the fabric) and then drove the screws into the original well liner holes in the tack strips starting from the center and working to the outside on both sides.

The front flap was then contact cemented to the top of the back seat support followed by the mounting of the rear seat convertible boot trim.

Top well center screw.

Top well tack strip center screw hole.

Top well screwed in.

Front edge contact cemented to seat back.

Top boot trim screwed on.

So, that's about it.  There are some pretty stubborn wrinkles and the windshield, side window, top seal intersection problems so I failed at the professional quality.  I'm tempted to remove the header section, adjust the header bow again, and re-install but that'll probably be next fall.  For now, I'm going to just live with it since I don't intend to drive in the rain (on purpose).

The new top, folded into the well.

New top driver side.  A bit wrinkly.

Rear quarter.  You can see how those stiff pads "dent" and show through

Passenger side
Done!  (or am I?)

So In summary, this was a pretty big job but not insurmountable if you follow directions... which I didn't.  Also, get the woven pads and a top that places bow 4 at 20 1/2".  Don't forget the rear window with a brass zipper instead of plastic.  Lastly, I would not have even attempted this had Richard (Dalorzof) not written his excellent document (and then held my hand throughout the install).  Thanks Richard! 

Monday, March 18, 2013

On Top of Ol' Rusty (Part 3)

When we last left off, I had completed the refurbish and assembly of the top frame.  The next step was obviously to put the frame back on the car.  I placed the folded-up frame in the top well and inserted the 6 bolts into their respective holes and then, with the top cylinders unattached, unfolded the the frame forward to the windshield header to get a feel for the fit.  I adjusted the header bow distance to allow the relaxed frame to latch to the visor pivots.  That's when I realized that something wasn't quite right.  The latch hook seemed to want to engage the visor bracket  before the latch handles were locked back.  Strange.

I fiddled with it a bit until I realized what had happened.  I had installed the latch hook blocks on the wrong sides!  Grumbling, I grudgingly removed the latches from the frame and brought them back to my bench,  knocked the pins out of them, and set to figuring out how they were supposed to go back together.  I finally sorted it out and installed the latches back onto the frame and viola!  They worked as expected.

Removed the latches from the header bow.

The correct way that the springs are installed.

The correct assembly of the passenger latch.

The correct assembly of the passenger latch and spring.
The next step was to ensure the adjustment of the frame in relation to the windows.  The various manuals and guides are specific about the tolerances and my frame appeared to meet the requirements.

The rear window in relation to the rear frame segment.

The clearance of the side window to the center link of the frame.

Frame installed with rear bow in place.
Well... no sense in putting off the inevitable.  I loaded up Dalorzof's convertible top guide on my shop computer and started through it. The first step was to install the pads.  I had ordered a good-looking set from NPD.  The repro pads were surprisingly similar to the originals and even had the plastic strips glued to the header ends.  However, they were a bit narrower than the originals so I would have to keep that in mind as I was laying them out.   Of course, true to my luck, the outside-most header screw hole that I had drilled and tapped needed to be moved in about 1/4".   Dalorzof had used a paper template to make his own plastic header strips so I used his idea to transfer the screw holes from the header to the pads.  The holes could then be drilled and the pads screwed to the header bow.  I had previously measured the bow distances on the original frame before I took it apart and also confirmed my measurements with Dalorzof's document. After I had established the correct locations of the 2nd and 3rd bows, I clamped them to the pads.  Screws were then driven into the tops of the bows to hold them to the pads.  Lastly, I confirmed the location of bow #4.  Dalorzof's document indicated that the standard height was 20 1/2" from the rear trim to the middle of the bow and my original measurements confirmed this.  However, the ARO top I had purchased back in 2008 had a requirement of 21 1/2".  I test-fit the new top with the bow set at 20 1/2", 21", and 21 1/2" inches and sure enough, the top wanted to fit the best at the prescribed 21 1/2".   I put in some staples through the pads into bow #4 at the 21 1/2" setting.  What's the big deal with just an inch or so off of spec?  Read on.

The pads in comparison.  Old vs New.

Hmm.. the new pads are a bit narrower.

The plastic header strip is there!

A template was made of the old header strip and the new hole locations transferred to it.

The hole locations were then transferred to the new header strip.  Note the left-most hole.  I had to move it to the right 1/4" to accommodate the narrower pad.

The pads installed on the first 3 bows.
The pads stapled to Bow 4.
When I had purchased the ARO top back in 2008, I had convinced myself that a plastic curtain was what I wanted since this car was going to be just a driver.  Why pay the extra money for such a silly thing that just split out it's hinge in a few years?  Fast forward to today when I realized that the glass rear window was one of the very few options this car actually came with and was sure as heck going to replace that one measly part.  I called a few vendors to find just the right one and was finally swayed by Mustangs Unlimited for their Kee glass rear curtain which the salesman assured me would fit the top that I had bought from them in 2008.  What I forgot to ask was the simple question, "Does it have a brass zipper"?  The answer is no.  I was sorely disappointed but, for several reasons, decided to go ahead and make the concession that the Kee window is still of good quality and the hinge is reinforced so that it can withstand folding.  People will recommend taking the rear window out completely or unzipping it and laying it on a towel inside the top well but these prospects  don't appeal to me at all.  I'm going to use this car and in Oregon, that top is going to be folding up and down more than a Chinese contortionist and I don't want to mess with the rear window every time.  The more I thought about it, the more I liked the non-concours reinforced window.  The plastic zipper is tougher than it sounds too and works very smooth.

So, once I rationalized keeping the Kee curtain, I could move on to bigger and better things; The installation of the Kee curtain.  I temporarily installed the ARO top to ensure that certain measurements were kept in check.  Namely the zipper's distance from the tops rear opening edge.  I found that the tops most critical installation points were the flaps at the rear window opening, the bow listing sleeves, and the rear bow tacking reinforcement strip.  Once these points were clamped in place, the top could be used for reference throughout the installation.

I wielded my handy-dandy air-stapler loaded with a lethal ammunition that consisted of 3/8" x 1/4" crown staples that I had special ordered on Amazon.  The first victim that fell prey to its awesome power was the top zipper strip of the Kee curtain.  The measurements for it were fairly straight-forward with the lower tacking strip location being more critical, and variable.  Once I figured out the location of the bottom tack strip with some actual thought but mostly trial and error, I stapled it to the bottom of the curtain.  Actually, I think that it wouldn't be as difficult as I made it because the Kee tops have the tack strip location marked out  on the bottom flap... for a 20 1/2" bow setting!  There lies the problem with the weird 21 1/2" setting of the ARO top.  It seems that the side pads and the rear curtain expect a 20 1/2" bow height so mismatching a top and everything else just ads undue complexity to the project.  I was very lucky that the bottom flap of the rear curtain had a spare inch to use because the tack strip was nearly all the way to the bottom.

Comparing original curtain to the Kee.  Differences include a plastic zipper and reinforced hinge.

Clamping the listing strips to the bows for top test fit.

Clamping side flaps to frame for top test fit.

The rear curtain zipper strip test stapled to bow 4.

Checking the centering of the zipper strip and distance to edge of the top to the zipper.

Bottom tack strip test stapled.

Zipper strip stapled permanent.

Tack strip stapled permanent.

Window installed with top clearances test.
Up to this point, I had gone off the reservation so to speak and stapled the curtain permanently whereas Dalorzof's instructions wait till after the fitting of the rear quarter pads before stapling the top to bow #4.  I admit that I panicked a bit when I discovered this but chose to let the rear curtain determine the location and tension of the pads rather than the other way around.  I think I would do it Dalorzof's way if I were to do it again though.  I think that his is a more accurate method that likely allows for a tighter curtain.

Speaking of rear quarter pads, the time has come to fit these... dirty little buggers.  I still had one good original one so I started with that.  I located it's position on the quarter tack strips and tape... yes taped.. it on.  I then remounted the tack strip in the car to get a feel for where things lined up.  Sure enough, it was about an inch lower than the bow... yet another thing that doesn't agree with the 21 1/2" bow height.  I marked where the edges of the pads should come up to the bow with tape for reference when installing the new pads.  I marked the tack strip location on the old pads and attempted to transcribe them to the new pads but really, that just left me with a starting point.  There was still much trial and error and even then, they weren't nearly perfect.  However, one really good tip that I had learned from the Dalorzof documents, was to mark the pads with location of the corner seam on the car between the rear quarter panel and deck lid filler panel.  That line, if marked on both the pad and the tack strip, helps relocate them later.

Old pad taped to the tack strip

Old pad in it's old position compared to the new bow 4 position.

Transcribed new pad with old pad tack strip location.  Line indicates location of the rear quarter to deck filler panel seam for reference.

New pad in position.  Still some wrinkles but not horrible.

View from inside.
These particular reproduction pads are a hassle due to their being so stiff.  It was really difficult to determine what would cause wrinkles and what wouldn't and also, would tend to bunch up on the curved portion of the tack strip.  In short, I got them as close to "good" as I could get and stapled them to the bow and trimmed the excess.  Now, we can move on to the actual top install in Part 4.